Full HD-Bildqualität
Der 2-Megapixel-Bildsensor ermöglicht Ihnen Full-HD-Bildqualität. Mit diesem Komplettset gehören verwackelte Überwachungsaufnahmen der Vergangenheit an. Die neueste IP-Sicherheitskamera-Technologie erfasst alles kristallklar.
Kabellos
Die Zuverlässigkeit einer kabelgebundenen Verbindung, aber ohne Kabelziehen.
Dieses kabellose Set wird mit Powerline-Adaptern geliefert, mit denen Sie Kamerabilder über die Steckdose in Ihrem Zuhause oder Büro auf den Rekorder streamen können.
Hervorragendes Bild bei Tag und Nacht
Dank modernster Infrarot-Technologie erleben Sie Tag und Nacht eine hervorragende Bildqualität. Das Infrarotlicht reguliert sich vollautomatisch und sorgt so für optimale Bildqualität, unabhängig von den Bedingungen.
Wasserdicht und vandalensicher
Nutzen Sie die Kameras, wo und wann Sie wollen. Das Metallgehäuse ist wasserdicht und vandalensicher, sodass Sie die Kameras problemlos im Innen- und Außenbereich installieren können.
Aufnahme
Wählen Sie, ob Sie rund um die Uhr oder nur bei Bewegungserkennung aufzeichnen möchten. Der mitgelieferte NVR-Recorder verfügt standardmäßig über eine 1000-GB-Festplatte. Sobald der Festplattenspeicher voll ist, überschreibt der Recorder automatisch die ältesten Aufnahmen.
Möchten Sie Ihr Filmmaterial länger aufbewahren? Bestellen Sie das Festplatten-Upgrade gleich mit. Wir installieren die Festplatte, damit Sie sofort loslegen können.
Smartphone-App
Schauen Sie rund um die Uhr live über die kostenlose App auf Ihrem Smartphone, Tablet, Laptop oder PC zu.
Plug & Play-Kameras
Erleben Sie den Komfort der IP-Kamerasicherheit. Unser vorprogrammiertes System ist komplett Plug-and-Play!
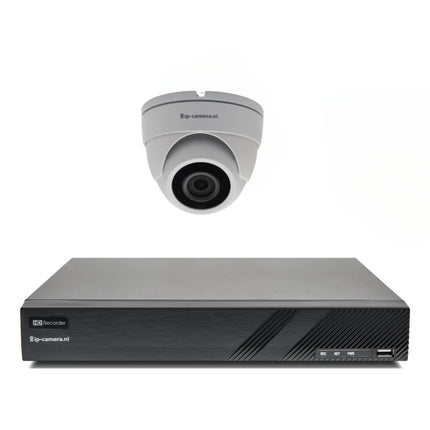
Packungsinhalt
Dieses Paket wurde sorgfältig zusammengestellt und wird komplett und einsatzbereit geliefert. Es enthält:
- Einfache Dome-Überwachungskamera mit Sony 2MP CMOS
- 4-Kanal-NVR-Recorder
- 5 Meter UTP-Kabel pro Kamera (zwischen Kamera und PoE-Adapter
- Powerline-Adapter mit Power over Ethernet
Eingebaute Festplatte 1000 GB (1 TB)
- Maus zur Bedienung des Rekorders
- Sicherheitsaufkleber-Set
- Niederländische Installationsanleitung
Sie können den Recorder an jeden Fernseher oder Monitor mit HDMI-Anschluss anschließen.